Build LMS platform from scratch. Part 5 — Users.
Hi folks, in this article, we will build a user module for our application. If you haven’t seen previous articles yet, I strongly recommend doing so because our feature developments are based on them very closely. But if you don’t want to do it due to personal reasons I have a long story short for you:
-
We have successfully defined the minimal business logic for our LMS (Roles + Functionality + Payments).
-
Selected a modern tech stack to support our needs (Elixir + Typescript + Postgres + OpenAPI + REST API).
-
Designed database entities for our feature schemas and migrations (Nine entities with detailed descriptions).
-
Set up infrastructure on AWS and GitHub for code checks and automatic deployments.
We’ve accomplished quite a lot! Now, it’s time to bring our work to life through code. We’ll start with a user module, based on email and password.
Start of the project
Let’s bootstrap the Elixir Phoenix application with main dependencies. I use the ASDF tool for dependencies management and suggest you do so:
elixir 1.18.2
erlang 27.2.2
After the successful installation of dependencies via ASDF, you need to run these commands in the projects folder:
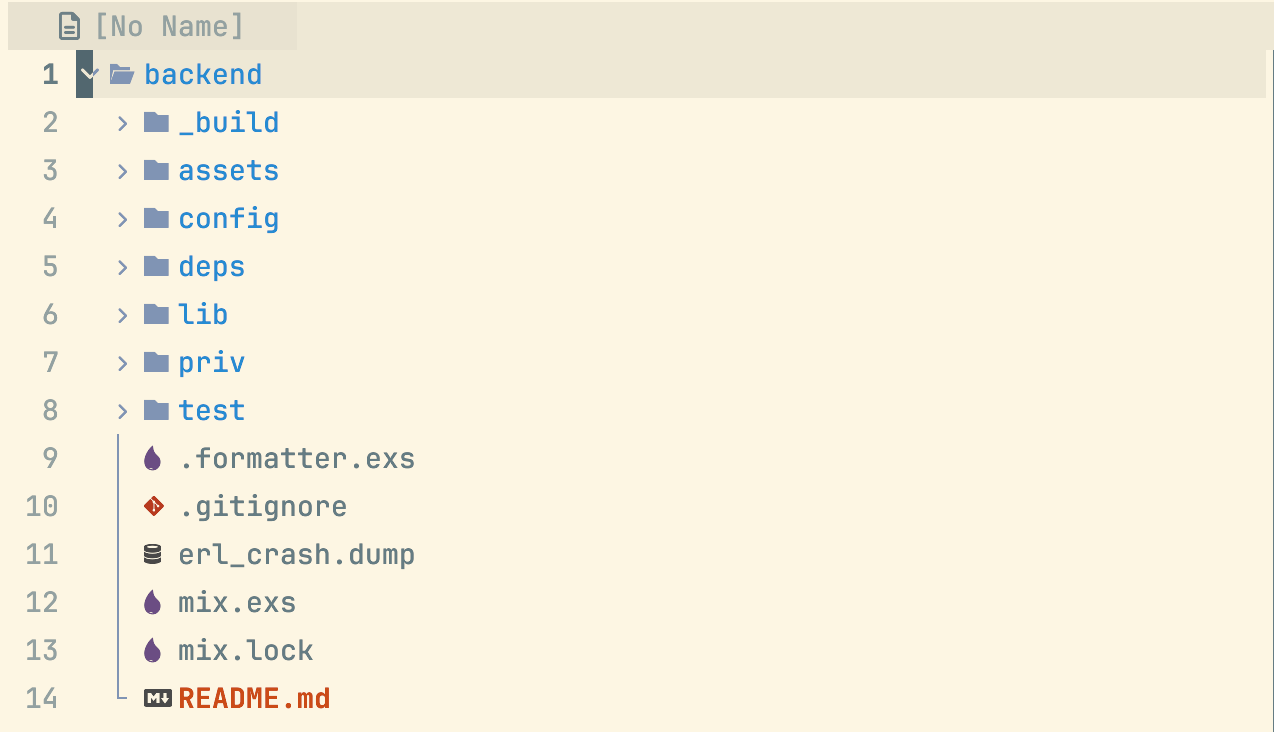
mix archive.install hex phx_new && mix phx.new <project_name>Once the installation is successful, you will see a boilerplate folder structure:
Database Migration
The most intuitive starting point for us is to write the SQL to create a user’s table in our database. Based on our notes from Part 3, I would make the following Ecto migration:
defmodule Backend.Repo.Migrations.AddUserTable do
  use Ecto.Migration

  def change do
    create table(:users, primary_key: false) do
      add :id, :uuid, primary_key: true, default: fragment("uuid_generate_v4()")
      add :first_name, :string
      add :last_name, :string
      add :email, :string, null: false
      add :password_hash, :string
      add :preferred_currency, :string, size: 3

      timestamps()
    end

    create unique_index(:users, [:email])
  end
end
You’ll notice here the same fields as in our database schema design and important constraints: emails in our database should be unique and not empty. Also if you read this chunk of code carefully, you will notice an interesting raw SQL fragment: uuid_generate_v4() .
As soon as our fields are supposed to be UUID (Universally Unique Identified) we will use an extension of the Postgres to perform this natively. Let’s define another migration that will come before our user’s table migration:
defmodule Backend.Repo.Migrations.EnableUuidOssp do
  use Ecto.Migration

  def up do
    execute "CREATE EXTENSION IF NOT EXISTS \"uuid-ossp\""
  end

  def down do
    execute "DROP EXTENSION \"uuid-ossp\""
  end
end
Here we enable a generator of UUID which will be available for us via uuid_generate_v4() command.
After the creation of those two migrations, we need to run them on our DB, via the Mix tool: mix ecto.migrate
You will see something like that if everything goes successful:

Also, you can track the progress of your migrations in the schema_migrations table of your database. Each row of it has information about when each version of migration was run:
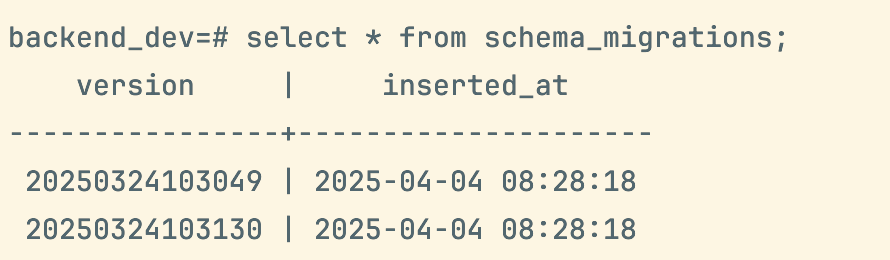
And that’s how your database toolkit like an Ecto understands what migration to run at the moment.
Ecto schema
When we have our table in the database we can already operate with data via raw SQL. For example in SQL tool:
SELECT email, password_hash FROM users;But that’s not what we want to do. We have our code base in Elixir, and it would be great to operate our data more conveniently, for example in Elixir structs. Like so:
%User{email: “new@gmail.com”, password: “12345”} |> insert_into_db()That’s actually what the Ecto Schema module does. It maps our Elixir struct to a database table and allows us to execute SQL code via Ecto ORM. So let’s define our first user schema:
defmodule Backend.Users.Schema.User do
  schema "users" do
    field :email, :string
    field :first_name, :string
    field :last_name, :string
    field :password, :string, virtual: true
    field :password_hash, :string
    field :preferred_currency, :string

    timestamps()
  end
end
And represent our table directly in the Elixir code. This will give us a more convenient and readable way to work with our data. See below how.
Work with schema
Now, let’s define several functions responsible for managing user data. When creating users, we need to hash their passwords and store only the hashed version, discarding the original. I’ll use the Argon2 library for hashing, as it’s currently the best option from what I found. Additionally, we’re replicating our database constraints here to ensure errors are raised at the Elixir application level rather than at the database level. It will allow us to handle them gracefully instead of plain text errors from SQL. See how we can do it:
defmodule Backend.Users.Schema.User do
  # ... schema
  def hash_password(changeset) do
    case get_change(changeset, :password) do
      nil ->
        changeset

      password ->
        put_change(changeset, :password_hash, Argon2.hash_pwd_salt(password))
    end
  end

  def create_changeset(attrs) do
    %__MODULE__{}
    |> cast(attrs, [:first_name, :last_name, :password, :email, :preferred_currency])
    |> hash_password()
    |> validate_required([:email, :password_hash, :preferred_currency])
    |> unique_constraint(:email)
    end

  def update_changeset(user, attrs) do
    user
    |> cast(attrs, [:first_name, :last_name, :email, :preferred_currency])
    |> validate_required([:email, :preferred_currency])
    |> unique_constraint(:email)
  end
end
And it’s worth noting that these changesets don’t interact with the database directly. You still need to explicitly make a database call when you’re ready with your changes. In our case, everything is ready and it is time to invoke these functions inside the main User business logic module, which handles database operations:
defmodule Backend.Users do
  def create_user(attrs) do
    attrs
    |> Backend.Users.Schema.User.create_changeset()
    |> Backend.Repo.insert()
  end

  def update_user(user, attrs) do
    user
    |> Backend.Users.Schema.User.update_changeset(attrs)
    |> Backend.Repo.update()
  end
end
Great! It’s our first complete chunk of code in this project and we are ready to test those functions in the interactive Elixir (iex) console and check the result:
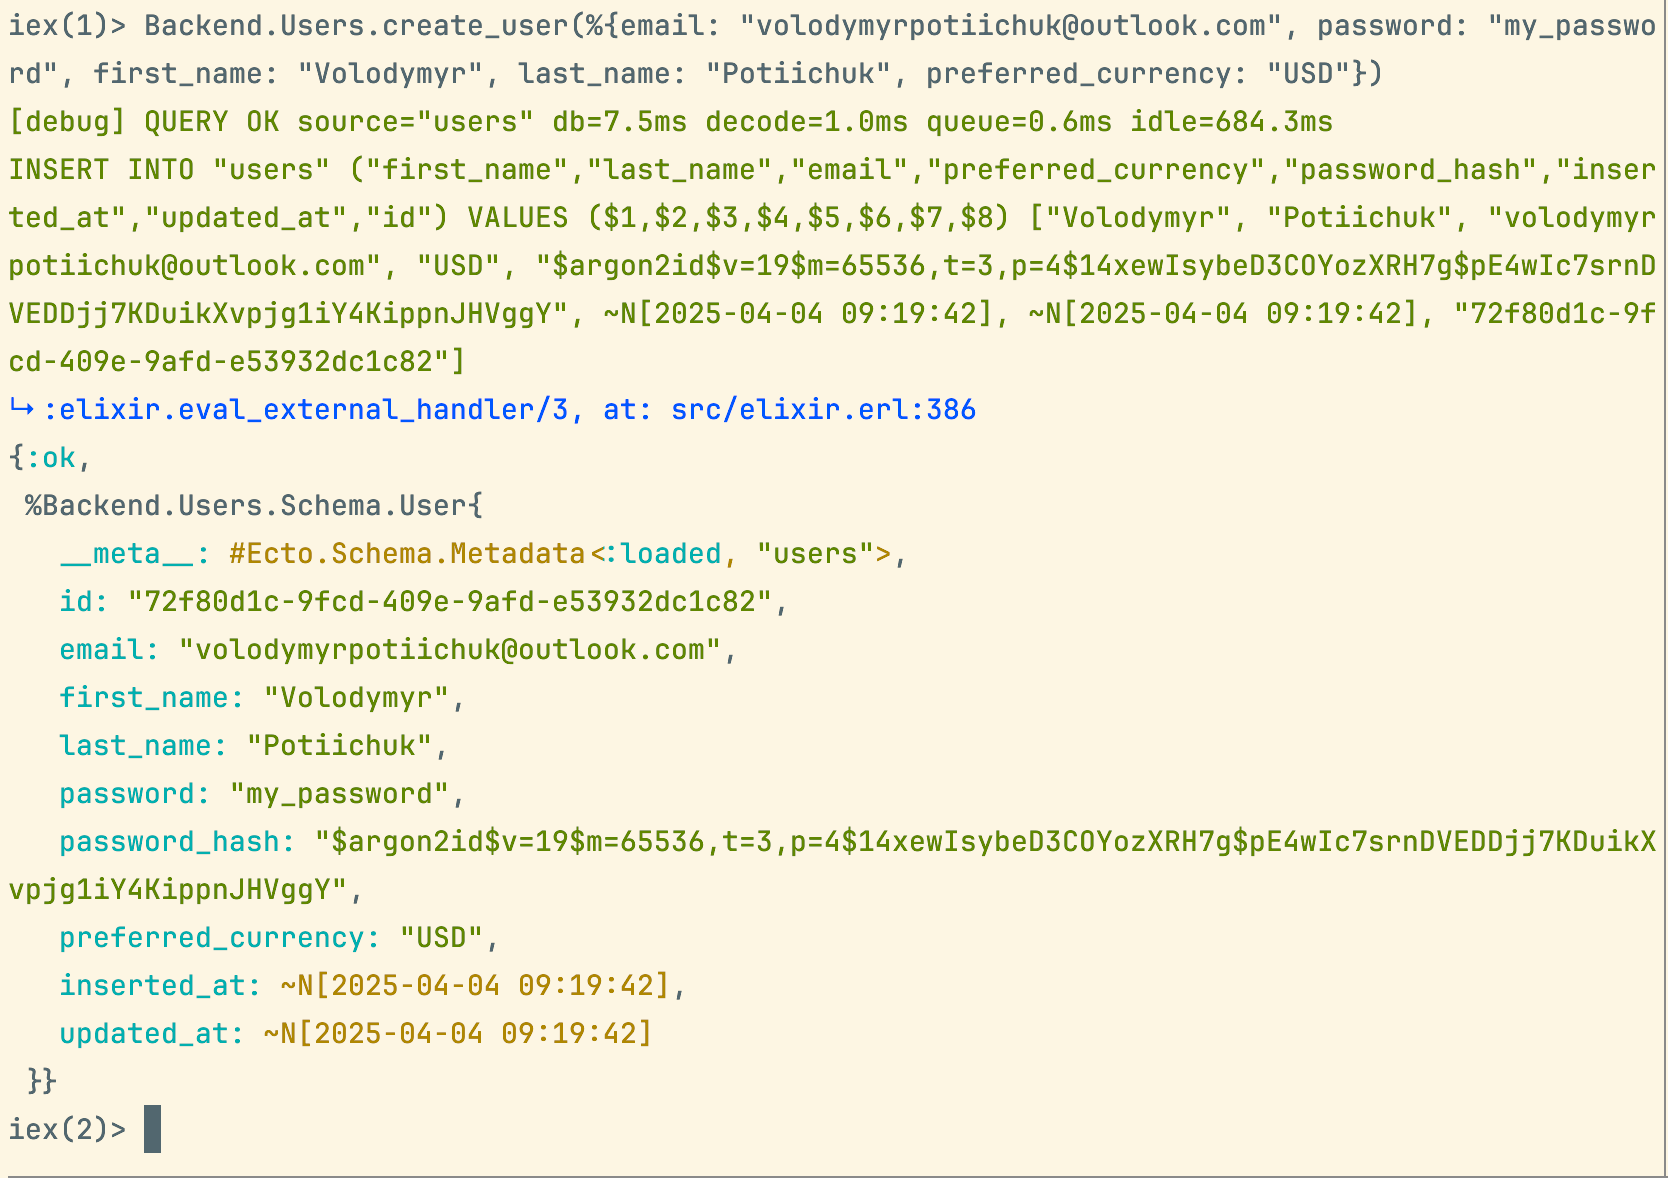
As a result, it returns a newly created user as an Elixir struct. We can now work with this struct — modify it, update it, or pass it through other functions to perform more complex and nested logic.
Let’s try running it again:
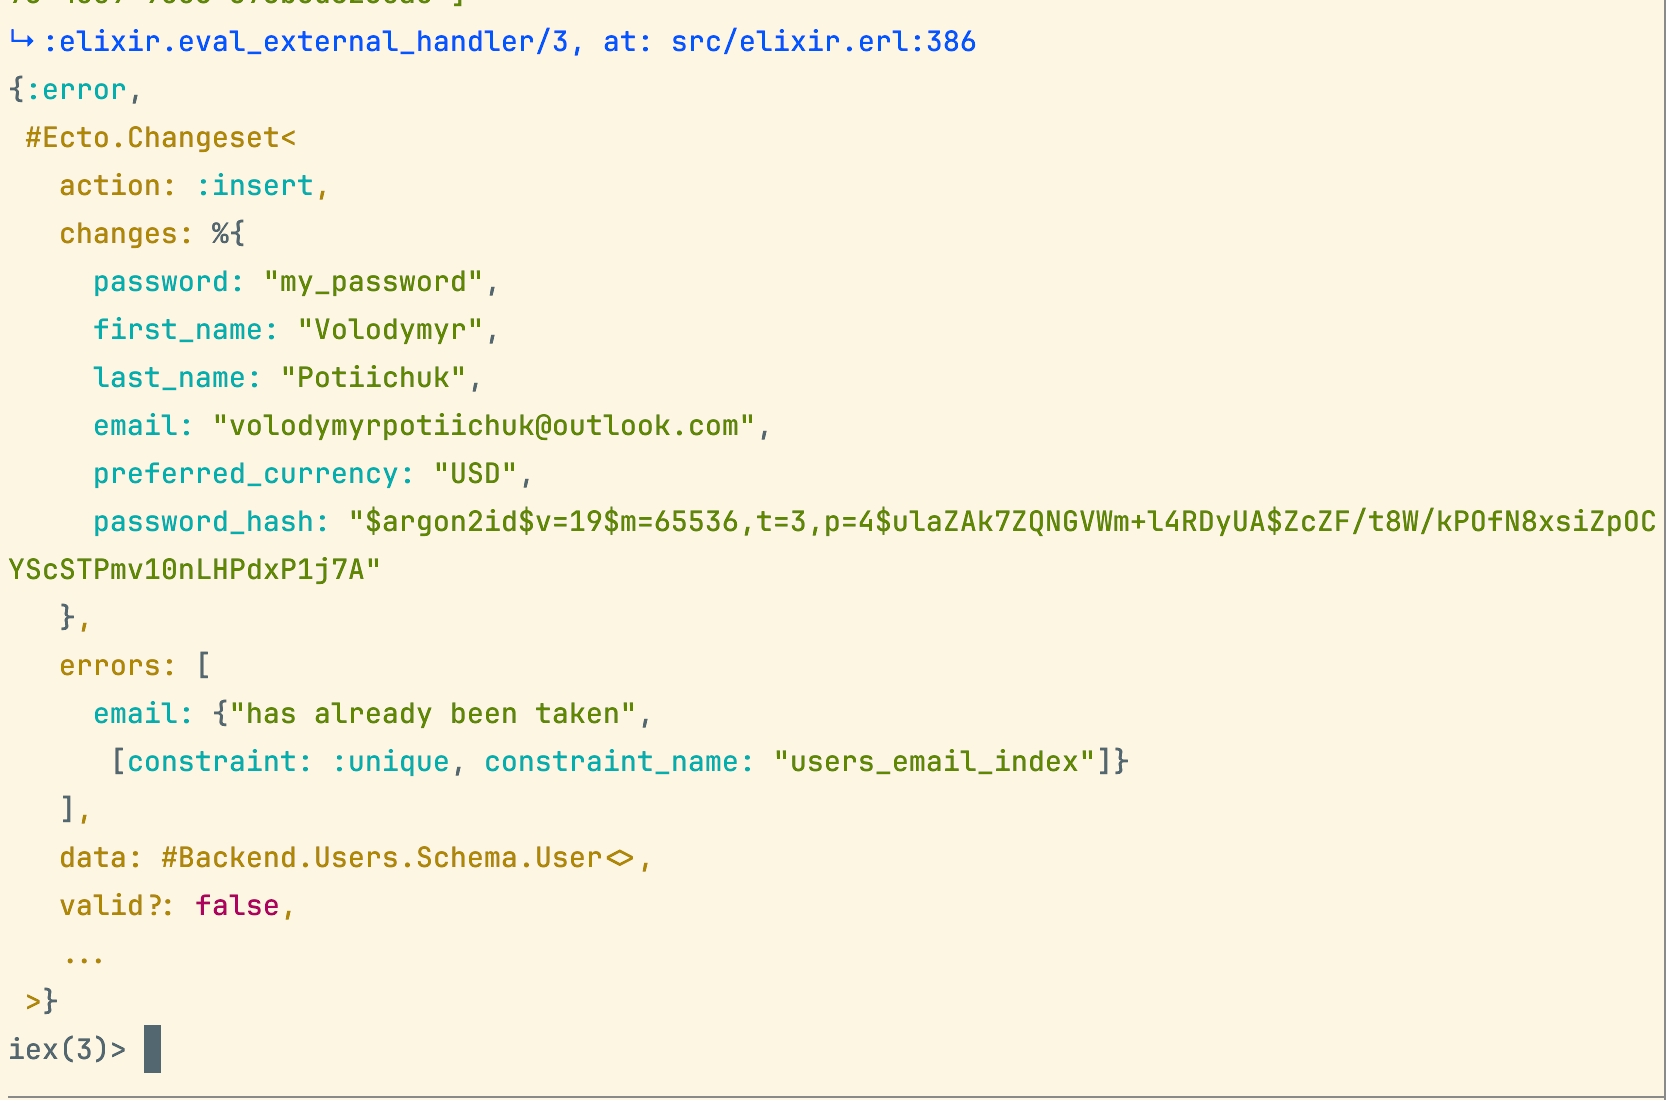
And voilà! We are not allowed to insert users with the same email — just as expected.
What’s cool here is that the database hasn’t even been touched yet. The changeset validation kicked in beforehand and caught the issue before any insert was attempted.
Conclusion
Today we have built a user entity functionality that allows us to create and update this user. In the next article, we’ll build out the authorization layer, set up routes to handle it, and write integration tests to make sure everything works as expected.